.png.5ff10cca1d0967e44a17e4a2edde2a80.png)


Robin
-
Posts
77 -
Joined
-
Last visited
-
Days Won
15
Content Type
Profiles
Forums
Events
Articles
Posts posted by Robin
-
-
With the sliding canopy complete we have to sort out if and how we can power it? so this post is going to get all engineery (if that's even a word)
When we bought the boat the canopy was operated by muscle power, opening it with the aid of gravity was easy however to push it up hill to close it was a bit of a problem. from inside with your hands above your head it was difficult and not good for your back! The best method was to go out on the deck and push from both sides and it would slide closed easily, Ok if it was not raining.
If you needed to close it. and you only had two crew on board, leaving the helm and hoping the boat would continue going straight long enough for you to raise the roof and get back in and return to the helm before you hit anything was not much of an option. To moor up to close the canopy every time it rained was impractical.
In phase one we had found the remains of an old wire and pully system which I believe was connected to a hand winch fixed to the back of the helm seat. The wires ran under the floor to the forward saloon bulkhead round a pully then up the bulkhead round another pully where it ran along side the canopy runner and was fixed to the back of the canopy sides, The wire was hidden from view with a timber capping, we had installed an electric winch in phase one to pull the canopy back up unfortunately this set up didn't work very well. The slope of the canopy runners was not very steep so when you opened the canopy you still had to push it down the hill with the winch in free wheel that's ok but after a few operations the cable would get twisted and would jam itself, and to top it all the winch was very noisy!
I would need to come up with a new set up which could power the canopy.( how hard could it be?)
The new set up would need to be quiet, raise the canopy evenly on both sides to stop it twisting even after hundreds of operations and have the ability to power it down as well as up. After weeks of head scratching, I settled on a hydraulic powered chain drive.
The power would come from a 12volt electric motor powering a hydraulic pump the type you get on a tipper lorry. I installed this in the saloon behind the settee under a blanket locker.

The blue tank holds the oil, the blue knob is a flow regulator and the two white square blocks you can see control the flow direction via a couple of push buttons positioned at the helm. I used two small Hydraulic motors to drive the chain.
 I made up two aluminum brackets and mounted these under the deck with the sprocket in line with the groove where the old wire ran and where I was going to run my chain.


The chain used is about the same size as your average bicycle chain. The chain would be need to be in one continues loop, I made a connector for the chain from a small piece of bronze to which I could then fix a section of brass angle which in turn would be my canopy anchor point.


In the picture above you can see where the chain disappears, it drops to below the deck and returns to the front via a couple of sprockets and an aluminum channel.
I powered up the electrics.
I connected the pipes to the motors in series, the theory being the oil would flow through the first motor and on to the second then back to the reservoir, (My theory was floored!!) Hydraulics work by oil flow and pressure, when it exits the first motor it will loose flow or pressure, thus reducing the rotation of the second motor, my synchronization of the two sides had just failed. If I tried pluming the motors in parallel I had no guarantee they would run at the same speed unless I introduced flow regulators which would need regular adjustment.
Many days of head scratching ensued.
The solution was to remove the motors, ditch one and use the other to drive a small shaft under the floor. A sprocket at each end of the shaft would drive the chain. I extend the chain down to below the floor and onto the newly introduced sprockets. This guarantees both sides move at the same speed .
The next picture shows the shaft and motor under the floor.


In the last picture you can see the chain connected to the shaft and a couple of chain tensioners to keep the whole system under tension.
This set up has been a lot of work an awful lot of head scratching but I enjoyed every minute of the challenge.
Robin
-
 7
7
-
 2
2
-
 2
2
-
-
With the ply covering complete we cover the top with an epoxy resin and woven fabric, unfortunately I don't have photos of this part of the process just the finished item, but I will take some when I next epoxy a roof and post them.
First the sides gets some varnish.


The epoxy roof gets painted and dressed on the outer edge to match the original profile.


.thumb.JPG.e42b7dbec6f27da039ef43bac05dddd3.JPG)
Varnish complete the windows get installed, they are the same shape as the originals and are fitted with a rubber moldings the only difference is I use a silver insert to give it a visual lift.
At the junction of the epoxy cover and the varnished sides I shape a strip of D section aluminum, This is polished and screwed in place.


To the rear of the canopy we have a canvas cover.
Moving to the inside we install a polyester covered 6mm ply and cover the joints with Mahogany beads.


-
8
-
1
-
4
-
-
With the ply stripped, repairs done and the new beam installed we turned the frame over.

In this picture you get a better view of the new beam and the repairs.

The side rails are saved and I enlarge the notches for the side supports.


Time to press on with the sides.
The sides are approximately 3500mm long so I have to scarf two sections of ply to make it long enough, I use the old sides as a template and cut them to size.

The extra timber rail you can see this end will fit into the notches on the roof section to add strength to the structure.
The guide wheels on the original sides had square plates, but that would be to easy so I round the tops of the plates and then spent many an hour cutting them in by hand 2 hrs per plate x 12 (bugger)

.thumb.JPG.a06b4aa6c40db029834b6d608dbb0a3a.JPG)
The sides are now ready to start fitting to the top. You can just about make out the groove along the bottom edge of the side which will sit over the runners on the boat.

Getting the sides glued on and making sure they will line up with the runners can be a bit tricky if you get in wrong the canopy wont fit the runners correctly, I treble check and make some temporary braces that fit into the grove on the bottom of the sides, These will hold the sides in the correct position until they are fixed in place and the glue is set. you can just spot them sticking out past the side.

Someone has lost his hat again!

.thumb.JPG.aab36fdda10966688a187ad14fe4a119.JPG)
When the glue is set we spin the unit over and start fitting the ply.
.thumb.JPG.ae35a29f1965e2e94f65dfd21575408c.JPG)

The ply sheathing is only 9mm thick so I double up the ply at the rear of the roof to add strength.one or two clamps to hold it in position until the glue sets.

-
11
-
1
-
-
Before I move on from phase one the following is a list of items completed but for which I have no photos. (sorry)
Prop shaft and cutlass bearing replaced, Shower installed, Electric toilets fitted, Fridge, sound system, LED lights, Nav lights, carpets throughout, Two more coats of varnish to the cabin sides and the transom, and an electric winch connected to the sliding coach roof through the original pulleys and guides.
We had another brilliant summer afloat including our second trip to the Beccles wooden boat rally and meet even more lovely people and had a look round some fantastic boats.
Fully enthused we are ready to start Phase two.
Item one on the list. We are going to start with the sliding canopy, the sides to the canopy were made of Brunzeel ply but it is showing its age and has started to delaminate, no amount of varnishing can hide this any longer. I want to keep the exterior as true to the original as possible.
I believe Brunzeel ply is still available in the USA however the cost of the ply and the shipping makes this option a none starter. we are going to use Robbins super elite which is a rotary cut Sapele faced ply that comes with a 25 year guarantee. they used to produce a Khaya faced marine ply this was a fantastic product but they stopped manufacture about 5 years ago.
We remove the sides
.thumb.JPG.dffab2954c844cefdf19d402341a15ff.JPG)
This picture shows the side of the old canopy, The dark staining is water getting into the delaminating ply. With the sides removed the coach roof is lifted off and placed on trestles.

( Victory V. please note the hat is back on)
.thumb.JPG.e991f91c74fdbefa6a97401857918f15.JPG)
.thumb.JPG.bd545942370cfea8f423317da78acfb1.JPG)
The ply covering is soft in places and has been patched several times, one of the beams and some vent support timbers need to be replaced.
.thumb.JPG.a689408bc896e8d22a75d54c8e0bb4db.JPG)
I remove all the old ply.
A full ply sheet bonded to the beams adds a lot of strength, a repair generally only adds weight not strength.
.thumb.JPG.5e3ed46ac776950d8d926837b67394ea.JPG)
.thumb.JPG.23675aa91ce04e01c0f0cb0875d6112a.JPG)
.thumb.JPG.50579dd195dc8a394060882ca6832216.JPG)
In the pictures above you can just see I have made a new beam and installed it with a couple of pads to support the roof vents.
-
11
-
2
-
-
19 hours ago, JanetAnne said:
."We?"

Don't fall for it folks! The superb finish on Kingfishers varnish work and her hull is the work of one person and she is absolutely brilliant at it.
A small point of order Janet Anne, i selected the color and collected the paint!
-
 4
4
-
-
With the bulkheads fitted we crack on with putting everything back in ready for the summer.
The old fuel tank on first viewing looked good.
 However on close inspection the base seemed flimsy and we could see signs of rust on the base inside.
This is a common problem with steel tanks as water in the tank from condensation sits at the bottom for years undetected, we binned it and went for a plastic tank.
 The hot water calorifier was next, it was the one which came with the boat and on inspection was serviceable so went straight back in.

The waste and water tanks are connected next, you will notice the green pipe which is connected to the waste tank rinse out flush pipe. my only excuse I can come up with is I must have been under the influence of alcohol at the time as everyone knows it should be white sanitation pipe the same as the inlets. (it was changed in phase two)

The water system pressure tank is hid behind the studwork in the shower area.
.thumb.JPG.06afcba7d635f0aab79067c968572a37.JPG)
At this point we obviously had to much time on our hands because even though we had painted the hull last winter we decided the hull needed a change of color.
We sanded the hull , blanked off any redundant skin fittings applied two coats of under coat and two of gloss.
.thumb.JPG.8a90e967ecaa078d2f4f4d8e5cb3476a.JPG)
.thumb.JPG.9bc7d03e439a6e0cee6e4785000cf186.JPG)

We completed phase one in May 2017 ready for the summer season afloat.


-
15
-
2
-
-
Turnoar
Yes many a piece of old furniture can be found in wooden boats around the broads, I have a planking job on at the moment and the customer has supplied his own timber which comes from old Church pews, The timber itself must have been felled 200 years ago, A better piece of proper pitch pine you will not find, it planes like butter and still has a very high oil content to it.
Robin
-
2
-
-
The furniture gets sanded back to bare wood and varnished, everything we varnish gets sanded back with 80 grit sandpaper to start, followed by 100, 180, and finally 240. After sanding we hoover the piece down and clean with a tack cloth. We use Epifanes varnish and this method works well for us however if you were to ask 20 different boatbuilders they would give you 20 different methods and varnishes. If you find a system that works for you stick with it.
Before Varnish


And after


One of my customers asked me to install a new table in his boat as he didn't like his old one, after I installed his new one he suggested I skip the old one. It was made of Teak so it got sanded, varnished and is now in our boat.

Time to press on with the bulkheads, one of my favorite jobs, First step is to make a jig, I generally use thin strips of scrap ply which is easy to fit to the sides of the hull, these strips are glued together with a hot glue gun while still in situ, the theory is if I can get the jig out of the boat in one piece I can get the bulkhead back in when it is cut to shape.( SIMPLE)

The bulkhead to the side of the shower was moved towards the gearbox which makes the shower about 120mm wider you can see the step in the bulkhead to the right of the gearbox in the next pic.


The shower get covered with light blue sheets of Altro Whiterock.
next we install the bulkheads to the rear of the saloon quickly followed by the stain and varnish.


Robin

-
13
-
1
-
4
-
-
Hi Vaughan
Well spotted it is the original steering setup, and it is very well engineered it would be a shame to remove it.
I don't know if you are familiar with the Herbert Woods setup? they must have had some very good engineers as 50 years on the system still works perfectly and is such a joy to use.
.thumb.JPG.df5276d941671b046ae1250b02fa4d05.JPG)
It starts obviously at the Helm, on the hub there is a Gear driving a chain, (A motorbike rear wheel drive chain is about the same size) this joins to the wires with a couple of adjusters just above two pulleys which are bolted to the base of the bulkhead adjacent to the Chine, the wires then run all the way aft and wrap around a drum which is connected to what looks like a tractor steering box, this steering box moves a connecting rod which in turn is connected to the tiller.

Robin
-
4
-
-
With the bilges painted we start putting thigs back in.


With the modified 200ltr waste tank back in the center, we have just enough room either side to drop in two water tanks, I construct a solid base for them to sit on.

We have decided to go for Black plastic food safe water tanks manufactured by a company in Hull, They manufacture tanks of any shape and size to suit your specification and install sockets with Bsp threads in whatever location you require, the twin tanks will be plumbed in with a link tube for balance and will provide 230 ltrs of fresh water.


The engine now rebuilt and painted is next.


During the engine rebuild we inspected every thing thoroughly but we could find nothing wrong with the oil pump or the pressure switch, in the manual there is even a measurement for the pressure relief spring and the length was perfect so proceeded with the install. (this will bite us on the bum later)
The area under the engine and gearbox was painted, the keel bolts checked and tightened.
I built an oil catchment tray and dropped it in place.


My workshop is in part of the old Brooke marine shipyard and has a 10 ton overhead crane which makes installing and engine a doddle.


We proceeded with the install and everything seemed to go well however when we launched her and run the engine we still had the problem of high oil pressure!!!
Now during the summer all was well, we had enjoyed many a weekend until one day sunny day at Reedham. We had just pulled away from the quay and as I opened the throttle to pull away the oil light came on, as luck would have it I spun around and found a gap on the quay just in front of me.
I checked the oil level a good place to start I thought, the oil level was fine, convinced it must be the oil pressure switch feeding the light I removed it hopping to see oil pour out when I turned in over, Nothing!
We arranged a tow back to Lowestoft and lifted her out and removed the engine.
Now we had a stroke of luck while lifting our boat out an engineer friend turned up out of the blue, I explained my predicament and although he wasn't able to diagnose the problem he did have back at his workshop a complete BMC 2.2 engine block from which he would give me the oil pump and relief vale. (Result)
Engine stripped and the new parts in my possession I could compare the two.
Issue one. And why the pump failed was a sheared pin which holds the connecting dog on the end of the drive shaft to the oil pump.
Issue two. Was the old pressure relief spring was a lot stronger than the replacement one, it was the same length and the same diameter however the spring construction was heavier. Which made the oil pressure higher which in turn put to much pressure on the oil pump shaft drive pin.
I can only deduce that in the distant past when the engine had been rebuilt someone had fitted the wrong spring accidentally or deliberately I will never know.
Assembled and back in the boat we now have the correct pressure and the engine runs like a dream.
-
13
-
2
-
3
-
-
Hi Janet Anne
Everything internally has been painted with this product and it seems to have protected the timber very well however as with most good paint products from that age it has probably got a high lead content.
The hull of my Golden light I believe is made from Larch which was tantalized, when sanded back the timber has a green tinge to it. Tanerlizing in them days had a high arsenic content. enjoy.
Robin
-
1
-
-
Next item on the strip out list are the Bulkheads, eventually they will all have to go but for now we will concentrate on the aft of the center cockpit along with the aft shower/heads (toilets).
The bulkheads in our boat are made from chipboard clad on both sides with a type of Formica, if I remember correctly this product was called Bounty board it was introduced as the boatbuilding industry was quickly turning to fiberglass built boats. The Golden lights are the only wooden boats I have come across to date which have this type of bulkhead, probably as they were the last of the woodies produced in any numbers, at a time when all were going for fiberglass and looking for quicker build methods.
These boards had a predicted shelf life of about 25 plus years, so with ours making it through to 50 years must be seen as a result. not for us though as ours disintegrate in your hand with only the Formica faces holding them up.


The main bulkheads will be put back in exactly the same location however the shower will be moved slightly and we will sacrifice a small cupboard in the interest of a improved layout.


Earlier in the post I mentioned the large water tank which will be modified and used as a big waste tank. you will see from the pictures the old style toilet that sits straight on top of a small tank. The forward heads has the same set up. You can imaging how often you need to have a small tank pumped out and when you have two they obviously charge you double. hence the rational of one large tank. Also when used the toilets themselves don't seal particularly well so you often get an unpleasant odor throughout the boat.
We intend to install two Temac all singing all dancing electric macerator types.
The selection of the new bulkhead material is a bit of a quandary, we are not that keen on Formica for this style of boat so a varnished ply is the preferred option, now I would love to put in a marine grade Rotary cut Sapele from Robbins but at over £350 per sheet, and if we stick with the same throughout the refit we would need 18 sheets. we opt for the Robbins Elite range which is nearer the £150 price range, Still eye watering These sheets are made from a member of the Mahogany family called Gaboon and when fitted these will get 3 coats of Epifanes classic mahogany stain followed by 4 coats of Epifanes hi gloss varnish.

-
11
-
1
-
-
With the engine removed and striped we can now start the strip out of the center cockpit or if you prefer the saloon.
Under the floor currently is a large stainless steel water tank which will be turned into a waste tank. I will explain why later.


With the tank removed and off for modification we press on with the removal of all the floor bearers and associated timbers, we use sawdust to soak up any oily bilge residue, not the best of jobs.
The entire hull will be scraped back and any bare wood will be primed then two coats of Danboline bilge paint will be applied. Grey below the chine and white above.
Next to go are the electrics the best description i can give is basic.

A lot of early boats were wired with a positive earth, our Golden light was one of them, I will be going for a more modern negative earth setup. I would not class myself as an electrical expert my any stretch of the imagination. over the years I have seen many horror stories so when I can I completely rewire, My batteries are under the helm and the main panel will be in same location as before.
I'm not really keen on inverters so to keep it simple I intend to install a shore supply straight to a small consumer unit which will feed a ring main for normal sockets, an inline battery charger and an immersion heater. everything else will be 12volt.
A dash panel with all new gauges is my starting point.

To keep things tidy and keep cables out of the bilge area I generally fit cable trays and use cable ties to hold the cables in place. its easy to add cables at a later date when needed, this is probably a throwback from my shipbuilding days.


-
13
-
2
-
-
Janet Anne, your not wrong.
You cant get rid of me that easy. If I may quote Magnus Magnusson " that was your starter for ten"
Just a bit about our summer afloat aboard our new boat, we managed to use her every weekend from when we launched her In May through to November including two separate week long holidays with our children and their families.
We were very lucky to get an invite to our first Beccles Wooden boat rally, what a brilliant weekend that was! I must just say you will not find a more friendly and welcoming group of people anywhere on this planet.
This event seems to be expanding every year. I cant remember who suggested it first, but the meet at Oulton Broad yacht station on a Thursday with a cruise in company on the Friday to Beccles has proved to be a fantastic addition, there is even a rumor the northern river attendee's are planning a barbeque meet on the Wednesday evening at the Stracey Arms this year, and a cruise in company to Oulton on the Thursday, This would be another brilliant addition.
We only need two more venues for the Monday and Tuesday (suggestions on a postcard) and we could have an entire week afloat.
What a spectacular sight that would be!
I mentioned earlier a soft spot for Thorpe so whenever we get the opportunity we head that way for a meal in the Rushcutters. The explanation for this I will need to take you back to August 1975, I was working as an apprentice boatbuilder in Lowestoft, and on a Friday I attended college along with other apprentice boatbuilders from around the area all trying to gain our City & Guilds qualifications, one lad in particular Danny from Hearts cruisers would invite us over for a night out in the big city. One night in question we were in the "Boat and Bottle" now called The Rushcutters. I got chatting to a very nice young lady from Yorkshire and as it turned out she was on holiday with her family who had hired a boat from Hearts cruisers and were due to return it in the morning.
That night this girl stole my heart and has kept it safe ever since. We married in 1977 and as they say the rest is history.
Now back to our plans for Kingfisher.
When we bought her she was showing signs of her age, Being built in 1965 she would have been one of the last all wooden boats destined for the hire industry, and as such would probably only had a life expectancy of 25 years.
All the work to date with the exception of the decks was really just a quick tart up while we decided which way to proceed.
Now some 50 years old she is going to need a complete refit sooner rather than later, so over the summer we had got to know our boat pretty well inside and out, I came up with an estimate for the work needed of 4000 hours give or take.
Option 1, remove her from the water and completely restore her in one hit over several years However the biggest risk is loosing interest halfway through because of the enormity of the task in hand.
Option 2, divide the work into five phases, effectively taking her out of the water in November complete as much work as possible (weekends only) and return her to the water in May, and enjoy our summers afloat. repeat for five years, (simple) This option is a lot more tricky trying to keep her useable through out. however you do get a big boost of enthusiasm every summer with time to take stock and plan the next phase.
Optoin 2 IT IS.
November 2016 Phase 1
We are going to start in the main cockpit area, engine and gearbox out and assess, remove all the furniture, and restore, floor bearers removed, remove the water tank, fuel tank, hot tank, bulkheads, shower Toilet, forward toilet, floor bearers, strip out all pluming pipework and electrical cables.
I will start with the engine but a lot of the other work will be going ahead at the same time.
We knew she ran well and didn't smoke at all which is a good sign.


I mentioned earlier I love the BMC 2.2 and Borg Warner setup, and as far as I could tell it was the original engine which had had some interesting upgrades over the years, It has a 2.5 starter motor and a more modern injector pump which I am reliably informed is far superior compared to the old type.
We did however discover a issue during the summer, we had extremely high oil pressure 50psi on tick over and 80 to 100psi at 1200revs, she also had two oil leaks one from the front of the crank and one from the rear behind the flywheel. to get to the rear felt seal the crank would need to be removed.
The strip down


Once stripped we found the internals to be in extremely good condition, she had at some point been bored out to + 40thou that is the max so a re-bore is out of the question however I could still see the honing marks on the bores, The crank journals were at +40 as well but not a mark on them.
I decided she would live on and be rebuilt. the only thing I couldn't get my head round was the high oil pressure? the oil pressure switch wasn't sticking. The oil pump on the bmc is a gear type so if it wears you loose pressure not gain it.
-
1
-
1
-
3
-
-
With the decks now repaired our attention turned to the cabin sides, we had already decided the dark brown Sadolin finish had to go but what is it hiding?


we sanded the entire superstructure back to bare wood and was pleasantly surprised she was in better nick than expected, four quick coats of Epifanes varnish and she was looking presentable. while my wife had the varnish brush out it would have been a shame not to attack the transom.

With the transom looking good we added her name.
You can see on the aft bulkhead a brass number 5 from her hire days, this will be retained.

Getting ready for the summer we put in new batteries, finished fitting the deck fittings, fitted the rubbing strakes and antifouled her bottom, inside we had a quick spring clean and we were ready to go.


It was now May 2016 and we were determined to enjoy the broads in all her glory, and visit as many river side hostelries as possible.

-
13
-
2
-
6
-
-
We were now in a position to get her inside the workshop which will allow us to work in the evenings as well.
Generally the deck beams were in good condition with the exception of an aft section up against the cabin sides.
We were lucky that there was an original scarf joint about a meter from the transom which I could join to.
(A scarf joint needs to be at least six times the length of the thickness of the timber being jointed for maximum strength.)
We were now ready to install the 18mm marine grade ply BS1088. I use one called Robbins Elite
The stuff you can buy in your local builders merchant may be stamped BS1088 however there is no guarantee it will not delaminate in damp conditions.
genuine marine grade plywood sheets for boat use are 2500mm long as apposed to the builders ply at 2440mm long. Not a lot of people know that! ( Michael Cain)

The ply was cut to size, painted on the underside and screwed down on a bed of Butyl rubber mastic which doesn't set and forms a flexible watertight joint however it is very messy to work with if you are not careful.
The more observant will have noticed the hull has been filled and undercoated.
Next the deck covering. I wanted a fully waterproof covering with no joints which when painted had a traditional painted look.
I opted for fiberglass a setup i have used in the past which worked well.


Having first rounded the edge of the deck, filled in the screw heads we applied a coat of Polyester resin and let it set, this was then covered with 3 x layers of 2oz chop strand matt consolidated with resin all topped off with polyester flow coat. note this finish wraps over the edge of the deck which in turn will be covered by the rubbing strake.
The deck is sanded flat. Then we mask off any areas we don't want covering with the none slip covering. IE under the toe rails, the cant rails and any deck fittings.
The deck is now painted with interdec and kiln dried sand is heavily applied before the paint has had a chance to dry. It doesn't matter how thick you put the sand on as the paint will only soak up evenly. When dry just brush off the sand and the deck is ready to paint.


The whole thing is now painted with the desired finish.

-
9
-
1
-
3
-
-
Vaughan
Interesting to know she may have been in the Jenners fleet for a time,and based at Thorpe.my wife and i have a soft spot for Thorpe but that tale is for another day.
One of the reasons we bought the boat was its originality, we have kept the layout as per the catalogue with just a couple of minor tweaks,
Robin
-
3
-
-
Hi Vaughan
Yes she has a Broads Yacht type rudder and in addition the termination of the keel with its cutaway sections make her a dream going astern on tickover.
.thumb.JPG.84e0153377cb150a58bc51aa500879ce.JPG)
-
5
-
-
Hi Finny
You are correct, she was called September Dawn at one point , when we took over her ownership she was named Wood Nymph we didn't really like the name so we have called her Kingfisher.
I have had the pleasure a couple of times of meeting the owner from when she was called September Dawn.
You are not wrong about her being easy to handle, Herbert woods new a thing or two about wooden boat design, and if i could chose any setup of engine/gearbox combination for a Woodie it would be the Bmc 2.2 with a Borg Warner gearbox, and with the wright prop the low end torque is to die for.
Robin
-
3
-
-
Having only weekends to work on our new acquisition and just about 10 weeks to get her back in the water for the summer, I started in earnest on removing the old Trackmark and ply decks, the plan was to remove the decks completely, repair any deck timbers, install new 18mm marine grade ply cover that with three layers of 2oz glass fiber matt , form none slip panels in kiln dried sand painted over with international interdec paint. plus make and install new rubbing strakes and toe rails.
At this point I will mention I consider myself a very lucky man, not only does my wife love varnishing and painting she is very good at it
My wife would start sanding and prepping the hull, Antifouling below the waterline and varnish the transom.
We hate the chocolate color Sadolin finish on the cabin sides with a passion so it was going to have to go! We would sand it back to bare wood and see what we end up with?


-
8
-
2
-
3
-
-
Sunday the 6th March 2016
Our next step was to get her through the lock and lifted out so we could see what we have really bought and what needed to be done to get her usable for the summer.
We already new she needed new decks. The aft cabin sides leaked so bad some one had fitted a gutter on the inside to direct water away from the bunks. the batteries were shot, and she needed painting all over.

-
10
-
2
-
2
-
-
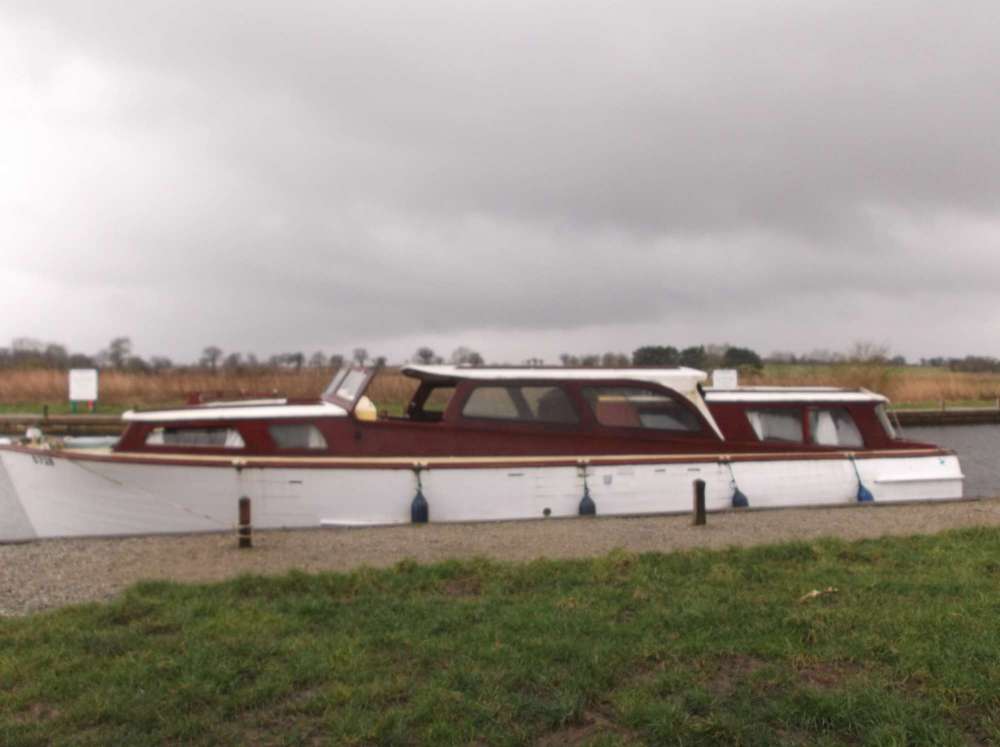
This is the story of the restoration of a 1965 Herbert woods cruiser, one of the golden light class.
My wife and I decided that we needed another boat, it would have to be a classic wooden cruiser , it would need to be in a usable condition.
We found this one at Wayford Marine in February 2016,she was not as good as the pictures suggested but she was afloat which was a good sign and after taking her for a quick spin down the river we made our offer.
Saturday the 5th March we collected her from Wayford. At this point sensible boaters would probably make a few short trips to get the feel of a new vessel and build up confidence in the engine and drive train. We however needed to be back in Lowestoft for teatime as it was our grandsons birthday. we cast off at 10am and headed off down the Ant, stopping briefly at at Ludham bridge for quick photo opportunity. then down the Bure to Yarmouth straight over Braydon water along the Waveney arriving at Oulton broad yacht station by 5pm


-
12
-
1
-
3
-
-
Hi Aboattime
You seem to be getting your Robins muddled up, my name is Robin Day a new member to the forum as apposed to the London rascal (Robin) of the Captains Blog Fame.
Robin
-
Thanks Grendal
i have them on a memory stick at the moment however i plan to put the on my home computer tonight and will try then.
Robin
-
1
-


.JPG.ef44764bcca6629624832055efb9e30d.JPG)


.JPG.c140c42f135b549e3c67b901b59b2c55.JPG)


.JPG.74b1bab559d7cd3f620124821448d427.JPG)
.JPG.dc79cd5bb727ec15c2cb7db30763cffb.JPG)


.JPG.673a6228c4c32baf33fc34d74f0141aa.JPG)

.JPG.289a7ab8ff5ae389eb5795e8ad101a87.JPG)
.JPG.6a56d0a8e1e4f7f678e64d1fc568ca52.JPG)
.JPG.4be5208f8fed668258976dc9992ecd2d.JPG)
.JPG.34678571ce3bbbf51121da2f5801b7c9.JPG)
.JPG.44fac207981fea041693017102f6207c.JPG)
.JPG.dec16bce26486fd075ff9aebde072457.JPG)


.JPG.b7ffe936dbdb6d2139a5df051ffb30d1.JPG)
.JPG.e577eec642d050237a0d1957a3d07f7a.JPG)
.JPG.6a270681b7c2525663d001084bf94c69.JPG)


.JPG.a668fd2eb706a0a6e7cc2f721f4f4286.JPG)


.JPG.3ffb9e0eb059a3e866b2343c84f0f95c.JPG)


Golden Light 5
in Restoration Projects
Posted
Next on the hit list is the hull, we have painted it a couple of times and although we have found no rot the joints between the planks do show signs of cracking which would indicate the caulking is getting past its sell by date and the putty is very hard and dry. Now with a wooden boat you never know exactly how good your hull is until you have sanded it back to bare timber.
Some people like to see the joints in the planks some of us don't, its just a personal preference.
I have long harbored a desire to spline a hull but it has never been the right time.
The first job is to sand the hull back to bare wood and rake out the old caulking.
We use hot air guns and scrape off the worst, then sand with a belt sander to clear the rest.
The hull is in extremely good condition with just a section of the rubbing strake at the rear to be repaired.
Next we rake out the joints.
With the decision made to spline the hull I need to decide how best to give the desired effect. I plan to cut along the top and bottom edge of the planks with a battery powered circular saw, the one I intend to use has a small blade of 2" in diameter and gives a smooth finish. The reason I cut the edge is to give a clean edge for the glue to adhere to. I angle the blade slightly upwards on the top edge and slightly down on the bottom edge this will give me a V shaped groove.
To keep the saw in line with the joint I pin a small spline to the hull parallel with the joint in the planks and run the saw along this, repeating this process until all the joints have the V shape.
In the next picture you will see I test fit a small section of beading, happy with the fit we cut 700 feet of splines (perhaps I should have bought a smaller boat)
With the splines cut, we start to glue them into place, the reason for the wedge shape is so the harder we force the splines in, the tighter the joint will be. I have also left the hull for about three months to allow the planks to really dry out, the benefits of this are two fold.
1, epoxy glue doesn't stick to wet wood very well so the dryer the wood the stronger the bond will be.
2, At this point the planks have lost a lot of moisture and have shrunk in their width this means when she goes back in the water the planks will swell thus putting my splines in compression and not tension which would stretch the splines and try to split them.
We apply epoxy glue to splines and brush epoxy into the grove this allows maximum glue penetration to each surface, My wife has cut small pieces of ply and drilled a hole in each, these are then placed against the hull on top of the spline, I insert a dry wall screw into the hole and drive it into the hull with a battery drill, This forces the spline into the grove nice and tight.
You should never use a dry wall screw on a boat as a permanent fixing as they are very brittle. but for a temporary fixing they are good because of their small diameter which leaves only a small hole when removed.
We lost count of the temporary fixings.
When the glue has set we remove the ply pads and after filling in any holes we sand the splines flush.
Sanded and faired we apply 4 coats of primer.
Followed by 3 undercoats.
And finally 2 coats of gloss.
We then get to do it all again on the other side.
Robin